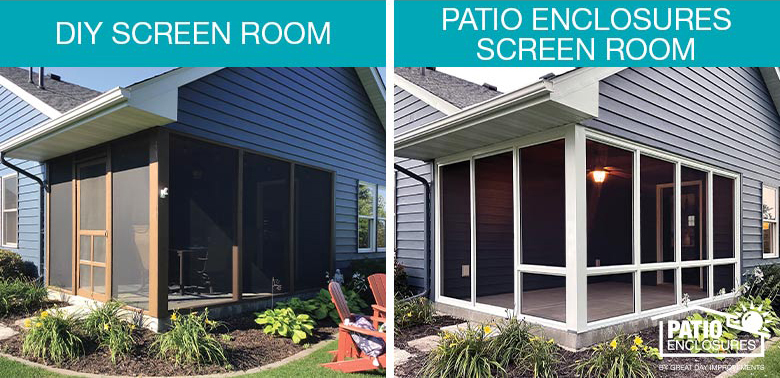
If you have an existing porch or patio, you’ve probably thought about screening it in at one point or another. Maybe you’ve gotten one too many bug bites or maybe you’re just tired of your neighbors watching your every move. Whatever your reason may be, consider hiring a professional before whipping out your own hammer and nails. Screening in a porch or patio is demanding work, and it’s easy to mess up without the right tools and experience. If you’re fine with the risk though and up for an adventure, read on as we teach you the art of screening.
The old-fashioned way to hang a screen is simply stapling up the screen to the porch’s wooden framework. For this, you only need a staple gun and a screen; however, with this method it is difficult to get the screen tight, which leads to sagging, ripped screens that need replaced every few years. Luckily, there is a more efficient method that lasts longer, looks better, and is appropriate for the amateur homeowner.
Materials Needed
To install a tighter, more secure porch screen you will need:
- A screwdriver or drill and 1-inch wood or sheetrock screws
- A utility knife and a roller knife
- Screen base and cap
- Vinyl or rubber screen spline
- Fiberglass, vinyl, or aluminum screen
- A rubber mallet
These supplies should be available at your local hardware store. The cost will vary, depending on your local supply.
Buying the Right Materials

Begin by calculating how much material you will need. Draw a diagram of your patio and multiply the width by the height of each wall to calculate the screen needed. Add 10 percent to account for waste.
Bases are in 8-foot sections, so measure each frame both horizontally and vertically, and add 10% to trim for length. The base should be spaced so you don’t have more than 2” between the end screw and the end of the base.
Many options of materials are available, so consider:
- You may need two different base sizes – 3.5-inch wide for 4x4 beams, and 1.5-inch wide for 2x4s
- Fiberglass screen is often less expensive, stretches tighter, and handles easier. Available in many colors, black is the most popular because it offers the best visibility and temperature control.
- If you use fiberglass screen you want .175 diameter spline, if you use aluminum screen you want .160 diameter spline
- Vinyl spline is often less expensive than rubber
- Cap trim is available in colors such as grey, white, beige, and brown. Find one that matches your home’s aesthetic
- Once you have your tools and materials, you’re ready to begin. Make sure to give yourself at least two days of nice weather to complete your project.
Screening the Porch
First, remove any old screen from your porch, including any battens, nails, screws, staples, and clear the frame to install the base strips.
Attach the base strips to the wall with screws. Be careful not to over-tighten so you don’t bend the base strip. Don’t worry about mitering the edges – they can overlap.
Cut a section of screen larger than your opening and use the roller knife and screen spline to roll the top horizontal side into the base first. Keeping the screen centered and as tight as possible, roll each vertical side into place, and finish by pulling the screen tight and rolling the bottom horizontal side into the base.
If you create a wrinkle or a fold in the screen, that’s okay – just pull out the spline and start again. You want your screen to end up flat, wrinkle-free, and as tight as you can get it. Trim the excess screen and any loose material.
Place the cap over the base and tap it down with the rubber mallet. This covers the ends of the screen, pulling it tight and giving your porch a finished look. In the future, remove the cap by gently prying it off with a screwdriver to make repairs and maintain your porch’s screens.
If your porch has a door frame, you can purchase a screen door for $100-$200 or more, depending on the material, look, and features you want. Doors are available in all colors, with glass panels and various locking mechanisms, so shop around to find the one that’s right for your home.
Should You Hire a Professional?
In short, yes. Installing screen is not easy work, and if you do it wrong, you’ll need to repair and maintain it constantly. You may also not be happy with the result after several days of work. You’d probably be better off hiring a professional and getting it done right the first time.
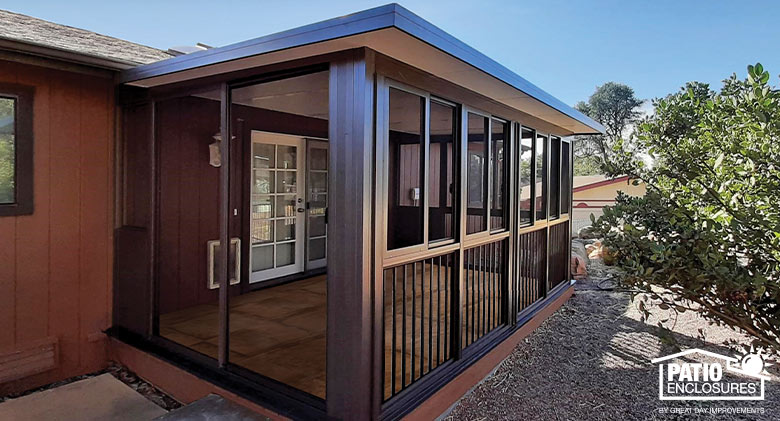
Patio Enclosures’ design consultants will explain the many options you have for screening in your porch or patio. And our screen rooms can easily be converted to glass for protection from the elements as well as from insects. So save yourself days of work and frustration and schedule your free in-home estimate or call 800-230-8301 today!
Learn More About Screen Rooms
 You May Also Be Interested In: